Event-Driven Programming in Node.js
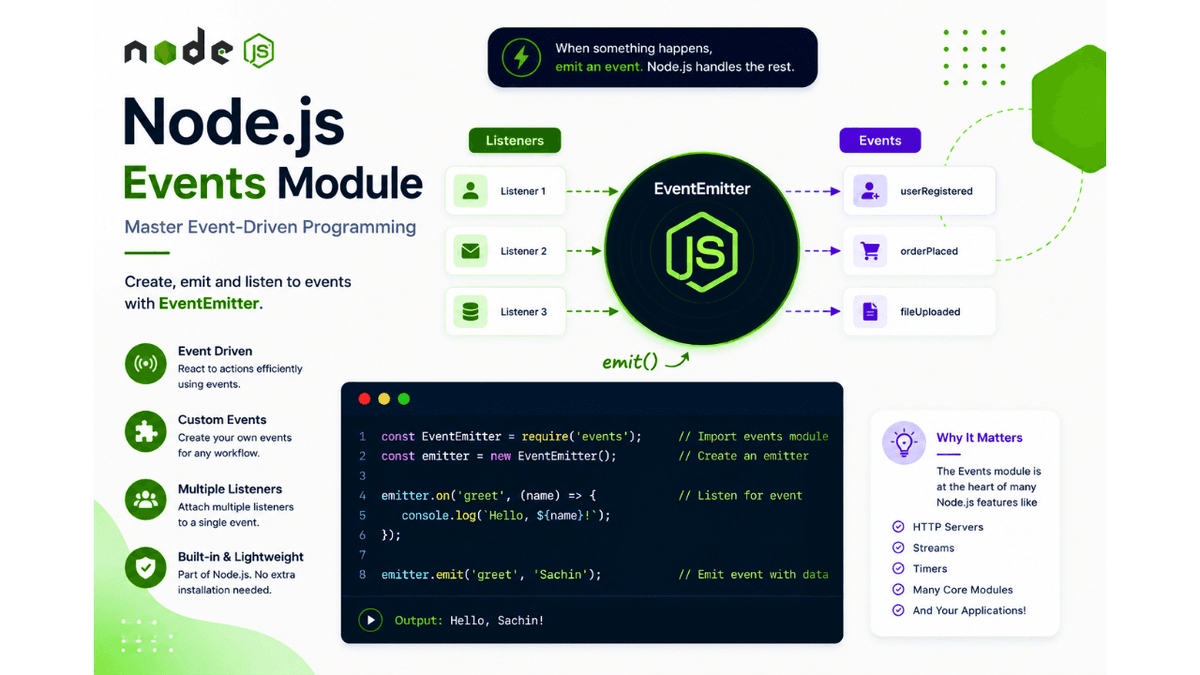
Learn how to use the Node.js Events module and EventEmitter to create custom events, register listeners, emit events, pass data, and build scalable event-driven applications.
Node.js Events Module Explained: Master Event-Driven Programming
One of the biggest reasons Node.js is fast and scalable is its event-driven architecture .
Whenever a user clicks a button, uploads a file, sends an HTTP request, or a file finishes loading, an event occurs. Instead of constantly checking whether something has happened, Node.js listens for these events and reacts when they occur.
This behavior is powered by the Events ( events ) module .
In this guide, you'll learn what the Node.js Events module is, how it works, and how to create your own custom events with practical examples.
Prerequisites
Before reading this guide, you should understand:
What Is the Events Module?
The Events ( events ) module is a built-in Node.js module that allows objects to emit events and respond to them using listeners.
It forms the foundation of Node.js's event-driven programming model.
Import it like this:
const EventEmitter = require("events");
Since it's a built-in module, you don't need to install anything.
What Is an Event?
An event is simply an action or occurrence that your application can respond to.
Examples include:
- A user logs in
- A file is uploaded
- A request reaches the server
- A timer completes
- A database query finishes
Instead of repeatedly checking for these actions, Node.js waits until they happen and then executes the appropriate code.
Understanding Event-Driven Programming
The workflow looks like this:
  Something Happens

↓

Event Is Emitted

↓

Listener Detects Event

↓

Callback Function Executes
This makes applications more efficient and responsive.
Creating an Event Emitter
To create custom events, first create an instance of the EventEmitter class.
  const EventEmitter = require("events");

const emitter = new EventEmitter();
Now emitter can emit events and listen for them.
Listening for Events
Use the on() method to register an event listener.
  emitter.on("greet", () => {
  console.log("Hello from Node.js!");
});
At this point, nothing happens because the event hasn't been emitted yet.
Emitting an Event
Trigger the event using emit() .
emitter.emit("greet");
Output:
Hello from Node.js!
The listener runs immediately after the event is emitted.
Passing Data with Events
Events can send data to listeners.
  emitter.on("welcome", (name) => {
  console.log(`Welcome ${name}!`);
});

emitter.emit("welcome", "Sachin");
Output:
Welcome Sachin!
This makes events flexible and reusable.
Multiple Event Listeners
You can register multiple listeners for the same event.
  emitter.on("orderPlaced", () => {
  console.log("Sending confirmation email...");
});

emitter.on("orderPlaced", () => {
  console.log("Updating inventory...");
});

emitter.on("orderPlaced", () => {
  console.log("Generating invoice...");
});

emitter.emit("orderPlaced");
Output:
  Sending confirmation email...
Updating inventory...
Generating invoice...
Every listener is executed in the order it was registered.
Listening Only Once
Sometimes an event should run only one time.
Use the once() method.
  emitter.once("login", () => {
  console.log("First login detected.");
});

emitter.emit("login");
emitter.emit("login");
Output:
First login detected.
The listener is automatically removed after the first execution.
Removing Event Listeners
Use off() (or removeListener() in older code) to remove a listener.
  function greet() {
  console.log("Hello!");
}

emitter.on("welcome", greet);

emitter.off("welcome", greet);
This prevents the listener from being called again.
Common EventEmitter Methods
| Method | Purpose |
|---|---|
on() | Register a listener |
emit() | Trigger an event |
once() | Listen only once |
off() | Remove a listener |
removeAllListeners() | Remove all listeners |
listenerCount() | Count listeners for an event |
These methods cover most everyday use cases.
Real-World Use Cases
The Events module is used in many Node.js features, including:
- HTTP servers
- File streams
- WebSockets
- Logging systems
- Authentication events
- Chat applications
- Background jobs
- Notification systems
Many core Node.js modules internally use EventEmitter .
Common Beginner Mistakes
Emitting Before Listening
Incorrect:
  emitter.emit("start");

emitter.on("start", () => {
  console.log("Started");
});
The event is emitted before the listener exists.
Always register listeners first.
Typing Different Event Names
Incorrect:
  emitter.on("login", () => {});
emitter.emit("Login");
Event names are case-sensitive.
Too Many Listeners
Adding many listeners without removing unused ones can lead to memory warnings.
Remove listeners when they are no longer needed.
Best Practices
- Use descriptive event names.
- Register listeners before emitting events.
- Use
once()for one-time operations. - Remove unnecessary listeners to avoid memory leaks.
- Keep event handlers focused on a single responsibility.
Practice Exercises
Build these small projects:
- Login Event Logger
- Notification System
- Order Processing Simulator
- Chat Event System
- Custom Logger Using Events
These exercises will help you understand how events work in real applications.
Production Tip
Large Node.js applications often use events to decouple different parts of the system.
For example, after a user registers, one event can trigger multiple independent actions such as sending a welcome email, logging analytics, and creating a user profile—without tightly coupling those features together.
Why the Events Module Matters
The Events module is one of the core building blocks of Node.js.
Understanding how events work will help you build scalable, asynchronous applications and better understand how many popular libraries and frameworks operate internally.
Conclusion
The Node.js Events module enables event-driven programming through the EventEmitter class.
By learning how to emit events, register listeners, and pass data between components, you'll be able to write cleaner, more modular, and highly scalable backend applications.