Nodemon Explained: Automatically Restart Node.js Applications During Development
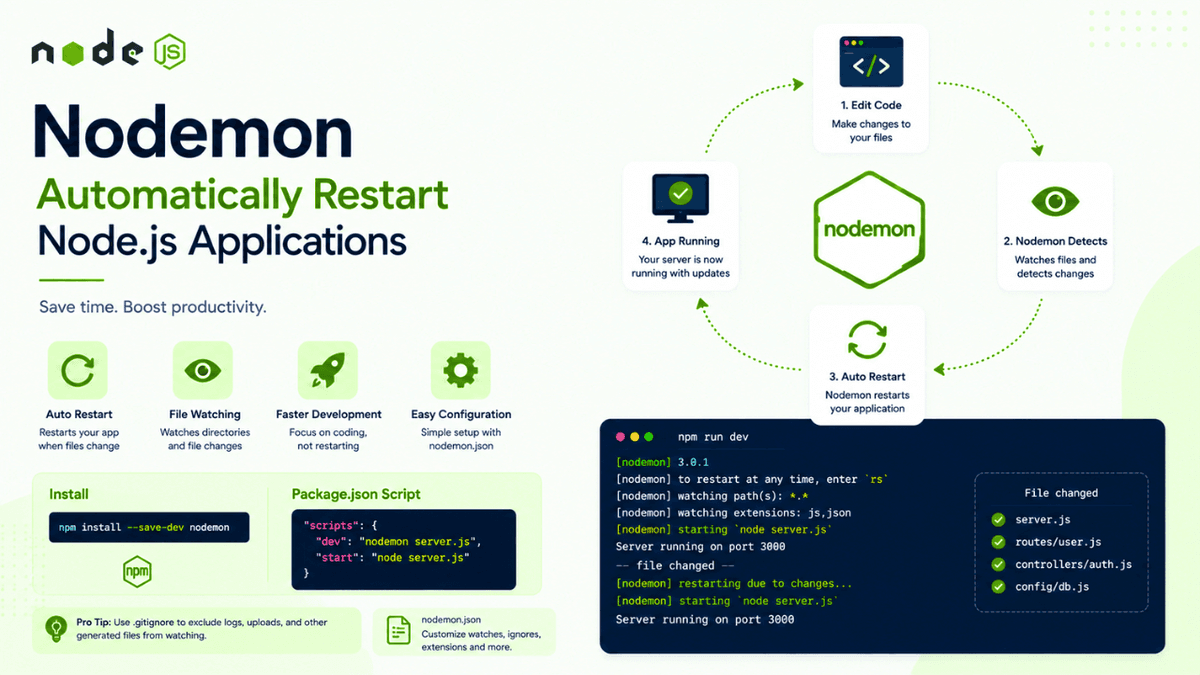
Learn how Nodemon automatically restarts Node.js applications when files change. Understand installation, configuration, nodemon.json, npm scripts, watch mode, and development best practices.
Nodemon Explained: Automatically Restart Node.js Applications During Development
When developing a Node.js application, you constantly make changes to your code.
You update a route.
You fix a bug.
You modify a database query.
You change an environment variable.
Then you need to stop and restart your Node.js server.
If you're running:
node server.js
you may repeatedly do this:
  Edit Code
   ↓
Stop Server
   ↓
Start Server
   ↓
Test Application
   ↓
Edit Code Again
This becomes frustrating very quickly.
That's where Nodemon comes in.
Nodemon automatically watches your project files and restarts your Node.js application whenever it detects a change.
Instead of manually restarting your server, Nodemon handles the development workflow for you.
What is Nodemon?
Nodemon is a development utility that monitors files in your Node.js project.
When a watched file changes, Nodemon automatically restarts the application.
The workflow becomes:
  Edit Code
   ↓
Nodemon Detects Change
   ↓
Restart Node.js Application
   ↓
Test Changes
This saves time and makes development much faster.
Why Do Developers Use Nodemon?
Without Nodemon:
node server.js
After changing your code:
  Change Code
    ↓
Ctrl + C
    ↓
node server.js
    ↓
Test Again
With Nodemon:
nodemon server.js
After changing your code:
  Change Code
    ↓
Nodemon Detects Change
    ↓
Application Restarts Automatically
The difference may seem small, but when you're working on a project for several hours, automatic restarts save a significant amount of time.
Installing Nodemon
There are two common ways to install Nodemon.
Local Installation
Install it as a development dependency:
npm install --save-dev nodemon
This is usually the preferred approach for projects.
Your package.json will contain something like:
  {
  "devDependencies": {
    "nodemon": "^3.0.0"
  }
}
Installing Nodemon locally ensures that every developer working on the project uses the version defined by the project.
If you want to revisit how local and global packages differ, check our earlier article on Installing Local vs Global npm Packages .
Global Installation
You can also install Nodemon globally:
npm install -g nodemon
Then you can run:
nodemon server.js
from different projects.
However, for team projects, local installation is generally more predictable because the dependency is explicitly recorded in package.json .
Running Nodemon
After installing Nodemon, run:
npx nodemon server.js
If Nodemon is installed locally, npx can execute the project's local version.
You can also define an npm script.
Using Nodemon with npm Scripts
A common setup looks like this:
  {
  "scripts": {
    "start": "node server.js",
    "dev": "nodemon server.js"
  }
}
Now run:
npm run dev
Your development workflow becomes:
  npm run dev
      ↓
Nodemon Starts
      ↓
Node.js Server Runs
      ↓
Edit Code
      ↓
Automatic Restart
This is one of the cleanest ways to use Nodemon.
It also keeps your development and production commands separate.
For production:
npm start
For development:
npm run dev
This distinction becomes especially important when deploying applications, as we discussed in our earlier article on Node.js Deployment Basics .
Basic Nodemon Usage
Suppose your project contains:
  project/
├── server.js
├── package.json
└── src/
Start the application with:
npx nodemon server.js
Nodemon starts your server.
When you modify:
server.js
Nodemon detects the change and restarts the process.
Watching Specific Files
By default, Nodemon watches files in your project directory.
You can specify specific files or directories:
nodemon --watch src server.js
Now Nodemon watches changes inside:
src/
This can be useful in larger projects where you want more control over what triggers restarts.
Ignoring Files
Sometimes you don't want certain files to trigger a restart.
For example:
  logs/
uploads/
tmp/
You can configure Nodemon to ignore them.
Example:
nodemon --ignore logs/ server.js
This prevents unnecessary application restarts when log files change.
Using nodemon.json
For more complex configurations, create:
nodemon.json
Example:
  {
  "watch": ["src"],
  "ignore": ["src/logs"],
  "ext": "js,json",
  "exec": "node src/server.js"
}
Now you can simply run:
npx nodemon
Nodemon reads the configuration automatically.
Understanding the watch Option
The watch option tells Nodemon which files or directories to monitor.
Example:
  {
  "watch": ["src"]
}
This means Nodemon monitors changes inside:
src/
You can watch multiple directories:
  {
  "watch": [
    "src",
    "config"
  ]
}
Understanding the ignore Option
The ignore option specifies files or directories that should not trigger a restart.
Example:
  {
  "ignore": [
    "logs",
    "uploads"
  ]
}
This is useful for applications that generate files during runtime.
For example:
  uploads/
   ├── image1.jpg
   ├── image2.jpg
   └── image3.jpg
You usually don't want every uploaded file to restart your application.
Understanding the ext Option
You can specify which file extensions Nodemon should monitor.
Example:
  {
  "ext": "js,json"
}
Now changes to JavaScript and JSON files can trigger restarts.
You can include multiple extensions:
  {
  "ext": "js,jsx,json,ts"
}
The exact extensions depend on your project.
Using Nodemon with TypeScript
If your project uses TypeScript, you may use a command such as:
nodemon --exec ts-node src/server.ts
Or configure it in nodemon.json :
  {
  "watch": ["src"],
  "ext": "ts",
  "exec": "ts-node src/server.ts"
}
For modern TypeScript projects, the exact runtime setup can vary depending on whether you're using ts-node , a build step, or another runtime.
The core idea remains the same:
  Source Change
     ↓
Nodemon Detects Change
     ↓
Run Development Command
Nodemon and Environment Variables
Suppose your application uses:
.env
and your code reads:
const port = process.env.PORT || 3000;
If your application uses a library such as dotenv , your development server can load environment variables during startup.
For example:
  require("dotenv").config();

const port = process.env.PORT || 3000;
When Nodemon restarts the application, the environment configuration is loaded again.
However, remember that changing environment variables may require restarting the process depending on how your application loads them.
Nodemon and File Uploads
Imagine your application has:
uploads/
When users upload files, the directory changes.
If Nodemon watches the entire project, these changes could trigger unnecessary restarts.
A better configuration might be:
  {
  "watch": ["src"],
  "ignore": ["uploads"]
}
This ensures your application restarts when source code changes, but not when users upload files.
Nodemon with Express
Suppose you're building an Express API:
  const express = require("express");

const app = express();

app.get("/", (req, res) => {
  res.json({
    message: "Hello Node.js"
  });
});

app.listen(3000, () => {
  console.log("Server running on port 3000");
});
Your package.json can contain:
  {
  "scripts": {
    "dev": "nodemon server.js"
  }
}
Start the server:
npm run dev
Now every time you modify your route, Nodemon restarts the application.
This is particularly useful when building REST APIs like the ones we've explored throughout this Node.js series.
Nodemon Is a Development Tool
One important thing to remember:
Nodemon is primarily designed for development.
You generally shouldn't use Nodemon as your primary production process manager.
For production, use tools designed for process management, such as:
- PM2
- Docker
- Kubernetes
- Cloud platform process managers
We've already explored PM2 in an earlier article, where we discussed automatic restarts, process monitoring, logs, clustering, and production process management.
The distinction is simple:
  Development
    ↓
Nodemon
    ↓
Automatic Restarts

Production
    ↓
PM2 / Containers / Platform
    ↓
Process Management
Nodemon vs PM2
| Feature | Nodemon | PM2 |
|---|---|---|
| Primary purpose | Development | Production |
| File watching | Excellent | Available |
| Auto restart | Yes | Yes |
| Process monitoring | Basic | Advanced |
| Logs | Basic | Advanced |
| Clustering | No | Yes |
| Production management | Not ideal | Excellent |
Nodemon focuses on developer productivity.
PM2 focuses on production process management.
Common Beginner Mistakes
Installing Nodemon Globally Only
Global installation works, but team projects are usually better served by a local development dependency.
Use:
npm install --save-dev nodemon
Then define a script:
  {
  "scripts": {
    "dev": "nodemon server.js"
  }
}
Using Nodemon in Production
Nodemon is designed to improve development workflows.
Use a production process manager for production deployments.
Watching Too Many Files
Watching generated files, logs, or uploads can cause unnecessary restarts.
Configure watch and ignore carefully.
Forgetting npm Scripts
Instead of remembering:
npx nodemon src/server.js
create a simple script:
npm run dev
This makes your project easier for other developers to understand.
A Recommended Project Setup
A simple Node.js project might look like:
  my-node-app/
│
├── src/
│   ├── server.js
│   ├── routes/
│   ├── controllers/
│   └── models/
│
├── uploads/
│
├── .env
├── .gitignore
├── nodemon.json
├── package.json
└── package-lock.json
Example nodemon.json :
  {
  "watch": ["src"],
  "ignore": ["uploads"],
  "ext": "js,json",
  "exec": "node src/server.js"
}
Example package.json :
  {
  "scripts": {
    "dev": "nodemon",
    "start": "node src/server.js"
  }
}
Development:
npm run dev
Production:
npm start
This creates a clear separation between development and production workflows.
Nodemon Workflow
A practical development workflow looks like:
  Write Code
    ↓
npm run dev
    ↓
Nodemon Starts Server
    ↓
Modify Source Code
    ↓
Nodemon Detects Change
    ↓
Application Restarts
    ↓
Test Changes
This simple workflow can significantly improve your development experience.
What's Next?
Nodemon makes development easier by automatically restarting your application.
But when something goes wrong, automatic restarts aren't enough.
You need to understand how to inspect your application, identify errors, set breakpoints, and investigate unexpected behavior.
That's where Debugging Node.js comes next.
In the next article, we'll explore Node.js debugging techniques, including the Node.js Inspector, Chrome DevTools, breakpoints, watch expressions, and practical debugging workflows.
Conclusion
Nodemon is a simple but extremely useful tool for Node.js development.
It watches your project files and automatically restarts your application when changes are detected.
The basic setup is straightforward:
npm install --save-dev nodemon
Then:
  {
  "scripts": {
    "dev": "nodemon server.js"
  }
}
Run:
npm run dev
From there, Nodemon takes care of restarting your application whenever your source code changes.
The important thing is to use the right tool for the right environment.
Use Nodemon to improve your development workflow.
Use PM2 or another production process manager to manage applications in production.
Once you add Nodemon to your workflow, you'll spend less time manually restarting servers and more time actually building and testing your Node.js applications.