Node.js Deployment Basics: How to Deploy Your First Node.js Application
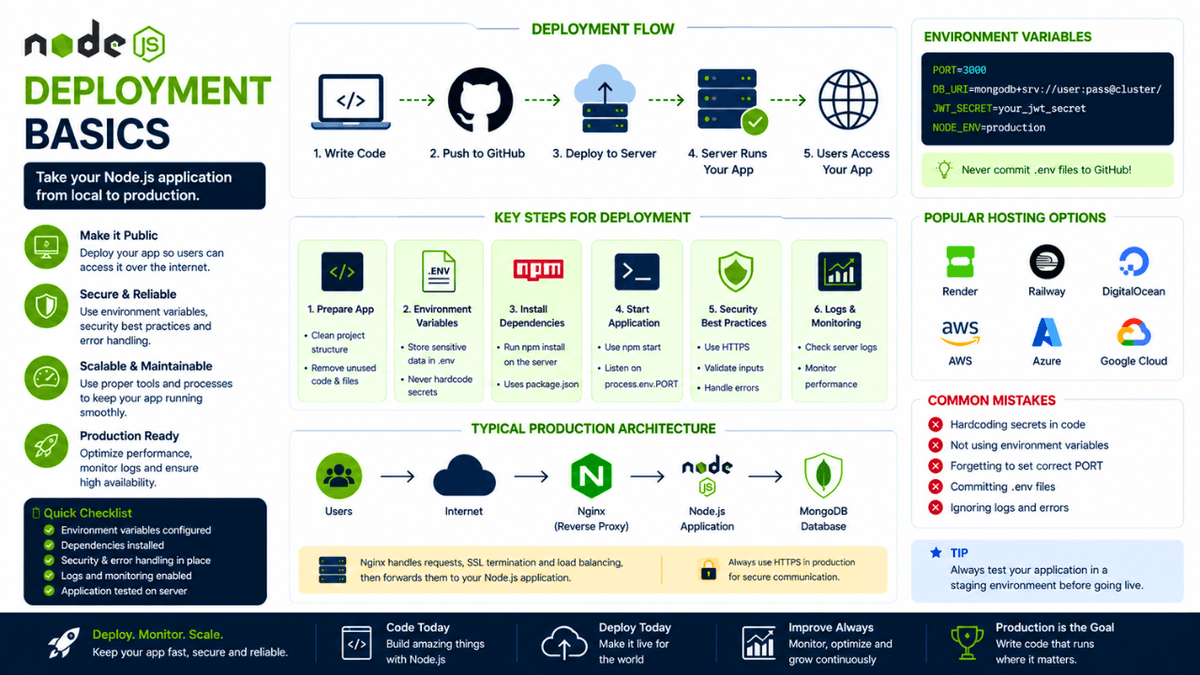
Learn the fundamentals of deploying Node.js applications. Understand production environments, hosting options, environment variables, reverse proxies, and deployment best practices.
Node.js Deployment Basics: How to Deploy Your First Node.js Application
You've built APIs, worked with file uploads, created CLI tools, and completed several real-world Node.js projects.
But none of those applications are useful if only you can access them on your local machine.
The final step in the development lifecycle is deployment —making your application available to users over the internet.
In this article, you'll learn what deployment is, how Node.js applications are deployed, common hosting options, and the best practices every backend developer should know before moving to production.
What is Deployment?
Deployment is the process of moving your application from your local development environment to a production server where real users can access it.
Development:
  Your Computer
↓
localhost:3000
Production:
  User
     ↓
Internet
     ↓
Production Server
     ↓
Node.js Application
Once deployed, your application becomes accessible through a public domain or IP address.
Development vs Production
Many beginners assume that if an application works locally, it's ready for production.
In reality, production environments require additional configuration and security.
| Development | Production |
|---|---|
| localhost | Public Domain |
| Debugging Enabled | Optimized Performance |
| Test Data | Real User Data |
| Frequent Changes | Stable Releases |
| Minimal Security | Strong Security |
Understanding this difference helps you build applications that are reliable outside your own computer.
How Node.js Deployment Works
A typical deployment workflow looks like this:
  Write Code
      ↓
Test Locally
      ↓
Push to GitHub
      ↓
Deploy to Server
      ↓
Users Access Application
Most professional teams automate this process using Continuous Integration and Continuous Deployment (CI/CD), but it's important to understand the manual workflow first.
Hosting Options for Node.js
There are many ways to deploy a Node.js application.
Popular choices include:
- VPS (Virtual Private Server)
- Cloud Platforms
- Platform-as-a-Service (PaaS)
- Container Platforms
Examples of popular hosting providers:
- Render
- Railway
- DigitalOcean
- AWS
- Azure
- Google Cloud Platform
As your applications grow, you'll choose a hosting solution based on scalability, pricing, and operational requirements.
Preparing Your Application
Before deployment, make sure your project includes:
  project/
│
├── package.json
├── server.js
├── .env
├── .gitignore
└── src/
A clean project structure makes deployment much smoother.
Using Environment Variables
Never hardcode sensitive information.
Bad:
const dbPassword = "mySecretPassword";
Good:
const dbPassword = process.env.DB_PASSWORD;
Then define the value inside:
.env
Example:
  PORT=3000
DB_PASSWORD=mySecretPassword
JWT_SECRET=myVeryStrongSecret
If you've already completed our article on Environment Variables in Node.js , you'll know why separating configuration from code is a production best practice.
Listening on the Correct Port
Instead of:
server.listen(3000);
Use:
server.listen(process.env.PORT || 3000);
Most hosting providers assign the port dynamically.
Hardcoding the port often causes deployment failures.
Installing Dependencies
Before starting the application, install all required packages:
npm install
This reads your package.json file and installs the project's dependencies.
Our earlier articles on npm and package.json explain how these files work together.
Starting the Application
Most projects define a production start script.
Example:
  {
  "scripts": {
    "start": "node server.js"
  }
}
Run:
npm start
Using npm scripts keeps your workflow consistent across different environments.
Reverse Proxy
In production, Node.js is often placed behind a reverse proxy like Nginx .
Typical architecture:
  Internet
     ↓
Nginx
     ↓
Node.js Server
A reverse proxy helps with:
- SSL termination
- Load balancing
- Caching
- Security
- Serving static assets efficiently
Even if you don't configure Nginx yourself initially, understanding its role is valuable.
Logging
Console logs are useful during development.
Production applications require structured logging.
Instead of:
console.log("User logged in");
Use a dedicated logging library and log meaningful information without exposing sensitive data.
We'll cover logging strategies in greater detail in upcoming articles on Logging in Node.js and Performance Monitoring .
Error Handling
Never expose internal errors to users.
Bad:
TypeError: Cannot read property 'name' of undefined
Good:
  {
  "message": "Something went wrong."
}
Detailed errors should stay in server logs, not in API responses.
Security Checklist
Before deploying, verify that you have:
- Environment variables configured
- Input validation implemented
- Sensitive files excluded from Git
- HTTPS enabled
- Authentication protected
- Error handling in place
Many of these topics are covered in our security-focused articles on Input Validation , Helmet.js , Rate Limiting , and CORS .
Common Beginner Mistakes
Committing .env Files
Never upload:
.env
to GitHub.
Always add it to:
.gitignore
Hardcoding Configuration
Avoid embedding API keys, passwords, or secrets directly in your code.
Use environment variables instead.
Ignoring Logs
When something goes wrong in production, logs are often the first place you'll investigate.
Treat logging as an essential part of your application, not an afterthought.
Real-World Deployment Workflow
A typical deployment pipeline looks like this:
  Code
   ↓
GitHub
   ↓
Build
   ↓
Install Dependencies
   ↓
Start Server
   ↓
Application Live
As you continue learning, you'll automate this workflow using deployment pipelines and process managers.
What's Next?
Deployment gets your application online, but keeping it running reliably is just as important.
In the next article, we'll explore PM2 , a powerful process manager that automatically restarts crashed applications, manages multiple Node.js processes, and simplifies production deployments.
Conclusion
Deployment transforms your Node.js application from a local project into a real product that users can access.
While writing code is important, understanding how applications run in production is what separates beginner developers from professional backend engineers.
By learning deployment fundamentals now, you'll be better prepared to work with cloud platforms, automate releases, and build reliable production-ready Node.js applications.