POST Requests in Node.js Explained: Send Data to Your Server
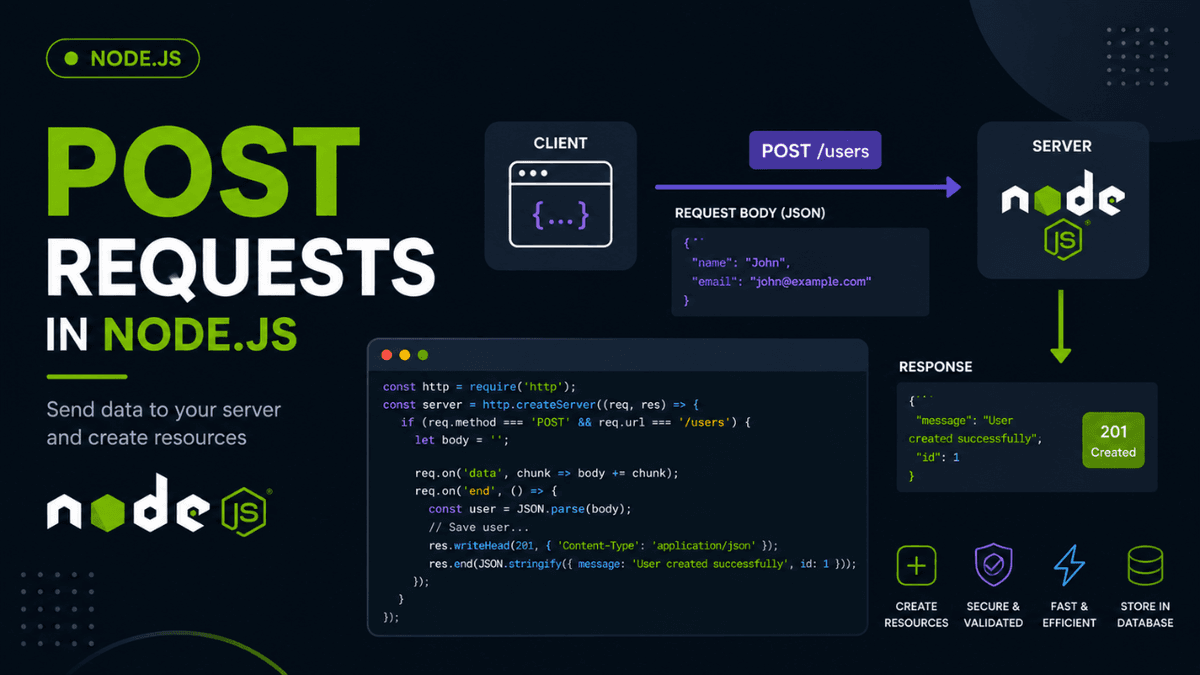
Learn how POST requests work in Node.js using the built-in HTTP module. Understand request bodies, JSON parsing, content types, and real-world API examples.
POST Requests in Node.js: Sending Data to Your Server
After learning how GET requests retrieve data from a server, the next step is understanding how clients send data to a server.
This is where POST requests come in.
Whenever a user registers an account, creates a blog post, uploads a product, submits a form, or places an order, a POST request is usually responsible for sending that data to the backend.
In our previous guide on GET Requests in Node.js , the client asked the server for information. With POST requests, the client sends information to the server instead.
What is a POST Request?
A POST request is used to create a new resource on the server.
For example:
- Creating a new user
- Publishing a blog post
- Creating a product
- Submitting a contact form
- Creating an order
- Saving a note
Unlike GET requests, POST requests contain data inside the request body.
Example:
POST /users
Request body:
  {
  "name": "John",
  "email": "john@example.com"
}
The server receives this data and stores it in a database, file, or memory.
How POST Fits Into CRUD
If you remember our article on CRUD Operations in Node.js , the Create operation maps directly to the POST HTTP method.
| CRUD Operation | HTTP Method |
|---|---|
| Create | POST |
| Read | GET |
| Update | PUT / PATCH |
| Delete | DELETE |
POST is responsible for the first step of the CRUD lifecycle.
Creating a Basic POST Route
Using Node.js' built-in HTTP module:
  const http = require("http");

const server = http.createServer((req, res) => {
  if (req.method === "POST" && req.url === "/users") {
    res.end("User creation endpoint");
  }
});

server.listen(3000, () => {
  console.log("Server running on port 3000");
});
This route accepts POST requests sent to:
http://localhost:3000/users
Understanding the Request Body
Unlike GET requests, POST requests do not send data through the URL.
Instead, the data is sent inside the request body.
Example:
  {
  "name": "Sachin",
  "email": "sachin@example.com"
}
The server must read this incoming stream of data before it can use it.
This is one of the reasons understanding Node.js Streams becomes valuable when building APIs.
Reading Incoming Data
Node.js receives request data in chunks.
Example:
  let body = "";

req.on("data", chunk => {
  body += chunk.toString();
});

req.on("end", () => {
  console.log(body);
});
Output:
{"name":"Sachin","email":"sachin@example.com"}
The data event fires whenever a chunk arrives.
The end event fires when the complete request body has been received.
This event-driven behavior is one of the reasons Node.js handles thousands of concurrent connections efficiently.
Parsing JSON Data
Most modern APIs send JSON data.
After receiving the body, we convert it into a JavaScript object.
  req.on("end", () => {
  const user = JSON.parse(body);

  console.log(user.name);
  console.log(user.email);
});
Output:
  Sachin
sachin@example.com
Now the server can validate, process, and store the data.
Later in this series, when we cover Input Validation in Node.js , we'll learn why blindly trusting incoming data is dangerous.
Complete POST Example
  const http = require("http");

const users = [];

const server = http.createServer((req, res) => {
  if (req.method === "POST" && req.url === "/users") {
    let body = "";

    req.on("data", chunk => {
      body += chunk.toString();
    });

    req.on("end", () => {
      const user = JSON.parse(body);

      users.push(user);

      res.writeHead(201, {
        "Content-Type": "application/json"
      });

      res.end(JSON.stringify({
        message: "User created successfully",
        data: user
      }));
    });
  }
});

server.listen(3000);
Response:
  {
  "message": "User created successfully",
  "data": {
    "name": "Sachin",
    "email": "sachin@example.com"
  }
}
Understanding Status Code 201
Successful POST requests usually return:
201 Created
This status code tells the client:
The resource was successfully created.
Common API status codes include:
| Status Code | Meaning |
|---|---|
| 200 | Success |
| 201 | Resource Created |
| 400 | Bad Request |
| 404 | Not Found |
| 500 | Internal Server Error |
We'll explore these in detail in our upcoming guide on HTTP Status Codes in Node.js .
Setting Content-Type Headers
Most APIs send JSON responses.
Example:
  res.writeHead(201, {
  "Content-Type": "application/json"
});
This tells the client how to interpret the response data.
Without the correct content type, browsers and API clients may process the response incorrectly.
If you haven't explored headers yet, our article on HTTP Headers Explained will cover this in depth.
Testing POST Requests with Postman
To test a POST request:
- Open Postman
- Select
POST - Enter the endpoint URL
- Open the Body tab
- Select JSON
- Send the request
Example body:
  {
  "name": "Sachin",
  "email": "sachin@example.com"
}
You'll receive the JSON response returned by the server.
We'll build a complete API testing workflow later in our guide on API Testing with Postman .
Common Beginner Mistakes
Forgetting to Parse JSON
Wrong:
console.log(body.name);
Correct:
  const data = JSON.parse(body);

console.log(data.name);
Using GET Instead of POST
Wrong:
GET /create-user
Correct:
POST /users
Returning the Wrong Status Code
Wrong:
res.writeHead(200);
Better:
res.writeHead(201);
Using correct HTTP semantics makes APIs easier to maintain and understand.
Real World Examples of POST Requests
POST requests power almost every modern application:
- User registration
- Login systems
- Blog publishing
- Payment processing
- Product creation
- File uploads
- Contact forms
Without POST requests, applications would only be able to read data but never create anything new.
Conclusion
POST requests are the foundation of data creation in Node.js applications.
Understanding how request bodies, streams, JSON parsing, and status codes work will make building APIs significantly easier.
Master POST requests early because every production backend relies heavily on them.
Once GET and POST become second nature, you're already halfway toward building complete REST APIs in Node.js.