Build a File Upload Server in Node.js: Upload Images and Files Without Express
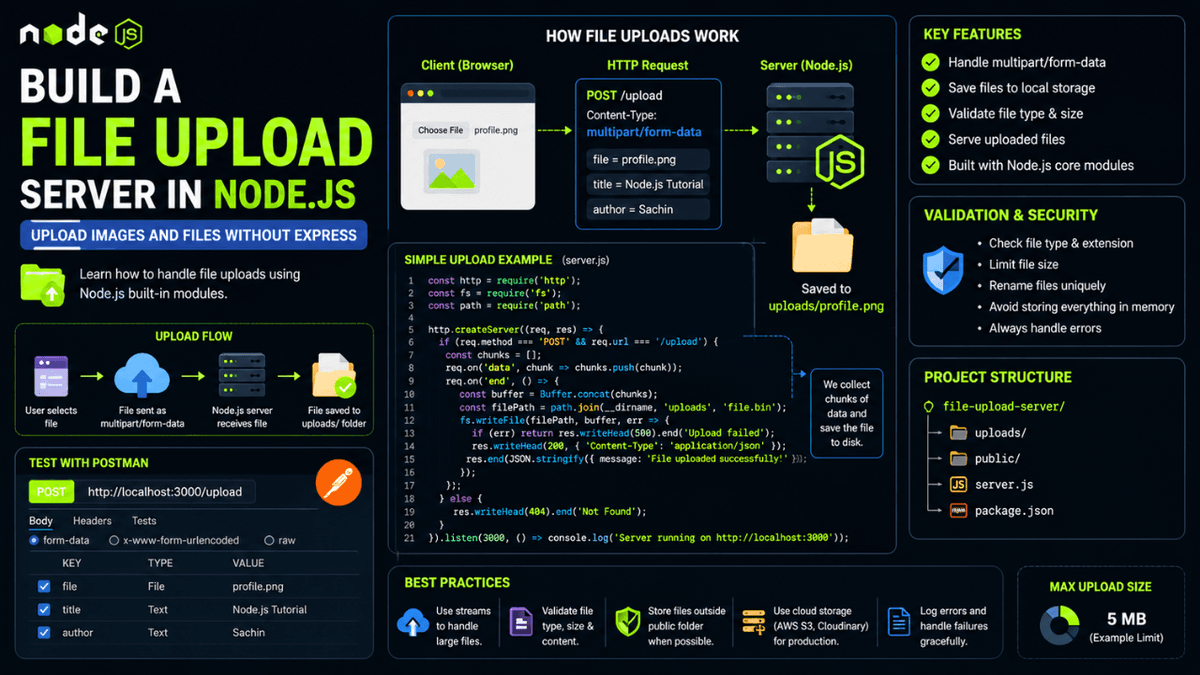
Learn how to build a file upload server in Node.js using the built-in HTTP module. Understand multipart data, file handling, storage strategies, and upload best practices.
Build a File Upload Server in Node.js: Upload Images and Files Without Express
File uploads are one of the most common backend features you'll build as a developer.
Whether users upload profile pictures, resumes, invoices, PDFs, product images, or documents, the backend must receive those files, process them, and store them safely.
After building a complete Notes API in the previous article, it's time to work with real files and understand how uploads work in Node.js.
In this article, we'll build a simple file upload server using Node.js and explore the concepts behind modern upload systems.
Why File Uploads Matter
File uploads power countless applications:
- Profile pictures
- Product images
- Resume uploads
- Document management systems
- Social media platforms
- Cloud storage applications
- CMS platforms
Almost every production backend eventually needs to handle files.
How File Uploads Work
Unlike JSON APIs, file uploads are usually sent using:
multipart/form-data
This allows browsers to send both files and text fields in a single request.
Example request:
  POST /upload
Content-Type: multipart/form-data
Request body:
  file=image.png
title=Node.js Tutorial
author=Sachin
This is different from the JSON payloads we used while building our Notes API because files cannot be represented efficiently as JSON objects.
Project Structure
  file-upload-server/
│
├── uploads/
├── server.js
├── package.json
└── public/
The uploads directory stores incoming files.
Most production applications eventually move uploads to cloud storage providers such as AWS S3 or Cloudinary, but learning local storage first makes the upload lifecycle easier to understand.
Creating the Upload Server
  const http = require("http");

const server = http.createServer((req, res) => {
  if (req.method === "POST" && req.url === "/upload") {
    res.end("Upload endpoint ready");
  }
});

server.listen(3000, () => {
  console.log("Server running on port 3000");
});
Our upload endpoint:
POST /upload
This route will receive incoming files.
Why Uploads Are More Complex Than JSON
When we created POST endpoints earlier in this series, we received request bodies using:
  req.on("data", chunk => {
  body += chunk;
});
This works well for JSON.
Files are different.
A 20 MB video cannot be loaded into memory as a simple string.
Instead, uploads rely heavily on one of Node.js' most important features:
Streams
If you've already completed the article on Node.js Streams , you've already learned the core concept that makes file uploads possible.
Receiving File Data
Node.js receives file uploads as chunks.
Example:
  req.on("data", chunk => {
  console.log(chunk.length);
});
Each chunk arrives independently.
Once the upload finishes:
  req.on("end", () => {
  console.log("Upload complete");
});
This event-driven architecture is one of the reasons Node.js performs so well when handling large uploads.
Saving Uploaded Files
Example:
  const fs = require("fs");

fs.writeFile(
  "./uploads/example.txt",
  fileData,
  err => {
    if (err) {
      console.log(err);
    }
  }
);
This stores the uploaded file on disk.
Since file uploads depend heavily on the File System module, understanding fs becomes extremely valuable when building backend applications.
Serving Uploaded Files
Once a file exists on the server, clients often need access to it.
Example:
/uploads/profile.png
This is similar to the static file serving concepts we'll explore in our upcoming guide on Serving Static Files in Node.js .
Upload Validation
Never trust uploaded files.
Always validate:
- File type
- File extension
- File size
- MIME type
Example:
  Allowed:
- png
- jpg
- jpeg
- pdf
Blocked:
  .exe
.bat
.sh
Without validation, file uploads become one of the biggest security risks in web applications.
File Size Limits
Example:
  Maximum Upload Size:
5 MB
Reasons:
- Prevent abuse
- Protect server memory
- Reduce storage costs
- Improve performance
Large uploads can easily overwhelm small servers.
Upload Directory Structure
Example:
  uploads/
│
├── users/
├── products/
├── invoices/
└── documents/
Organizing uploads early prevents maintenance problems later.
Naming Uploaded Files
Bad:
resume.pdf
Good:
1721119500-resume.pdf
Better:
user-34-avatar-1721119500.png
Unique filenames prevent accidental overwrites.
Local Storage vs Cloud Storage
Local Storage
Advantages:
- Simple setup
- Good for learning
- No external dependencies
Disadvantages:
- Difficult to scale
- Risk of data loss
- Server migrations become harder
Cloud Storage
Examples:
- AWS S3
- Cloudinary
- Google Cloud Storage
- Azure Blob Storage
Advantages:
- Highly scalable
- Faster delivery
- Built-in backups
- CDN support
Most production applications eventually move to cloud storage.
Common Beginner Mistakes
Storing Everything in Memory
Wrong:
Load entire file into RAM
Better:
Use streams
Streaming reduces memory usage significantly.
Trusting File Extensions
Wrong:
virus.jpg.exe
Always validate MIME types and file contents.
Allowing Unlimited Upload Size
Unlimited uploads create denial-of-service risks and can crash small servers.
Missing Error Handling
Always handle:
- Upload failures
- Disk errors
- Invalid files
- Permission issues
Robust upload systems expect failures.
Real World Examples
File uploads power:
- Instagram posts
- LinkedIn profile photos
- E-commerce product galleries
- Resume portals
- Cloud storage products
- Learning management systems
Without uploads, modern web applications would feel extremely limited.
Conclusion
File uploads introduce developers to streams, file systems, storage strategies, and backend security considerations.
Understanding these concepts early makes it much easier to build production-ready applications later.
More importantly, file uploads represent one of the first places where backend performance and security become critical.
Master file uploads, and you're one step closer to building real-world Node.js applications.